Basil Pesto Cheesy Puff Pastry Christmas Tree Recipe

Introduction

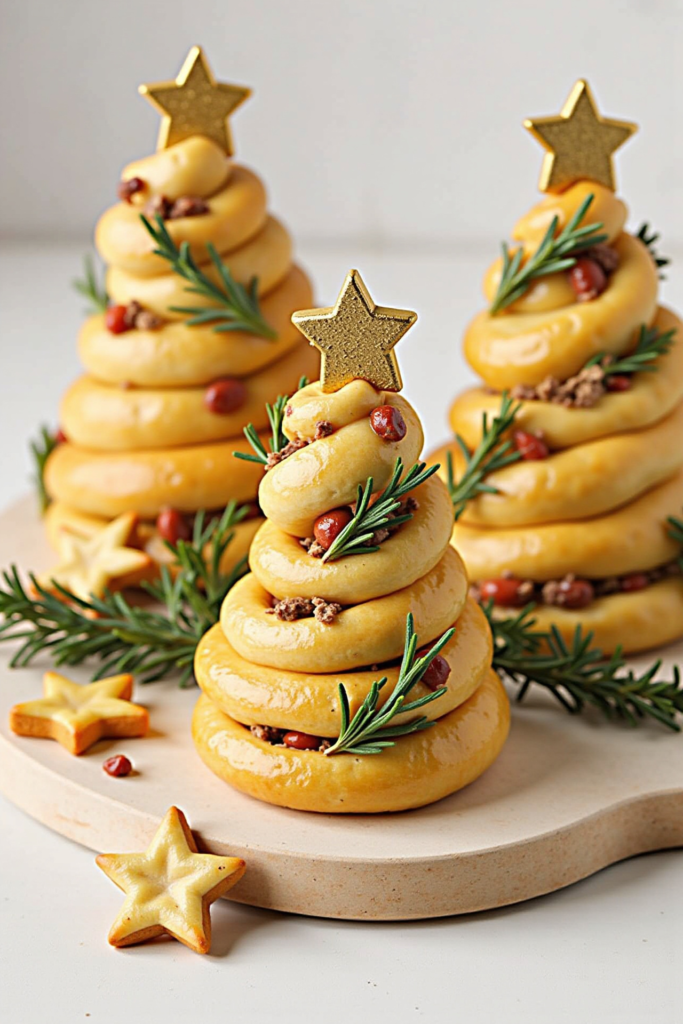
Few appetizers say “celebrate” like this Basil Pesto Cheesy Puff Pastry Christmas Tree Recipe. Flaky, golden layers of puff pastry are twirled with fresh basil pesto and gooey, melty cheese, then shaped into a stunning Christmas tree that’s both eye-catching and delicious. Whether entertaining a crowd or sprucing up your holiday table, this festive treat combines show-stopping presentation with unbeatable flavor.

Why Make a Basil Pesto Cheesy Puff Pastry Christmas Tree?

This recipe is the ultimate crowd-pleaser: crisp pastry, aromatic basil, and oozy cheese, all in an easy-to-share pull-apart format. It comes together with minimal ingredients and effort, but the end result looks and tastes like you spent hours in the kitchen. Perfect for holiday gatherings, potlucks, or a festive family afternoon, it’s a savory appetizer that’s as fun to assemble as it is to eat.

Crafting Your Festive Puff Pastry Tree

No special skills required! Just layer pesto and cheese between two sheets of puff pastry, slice and twist to create “branches,” and bake until golden. The secret is brushing the tree with a touch of egg wash, which creates a shiny, bakery-style crust—guaranteed to catch everyone’s eye. Customize with your favorite cheese blend for even richer flavor.

Serving Suggestions for a Party-Ready Appetizer

Serve this showstopper on a festive platter with a bowl of marinara or even more pesto for dipping. It pairs beautifully with sparkling drinks, roasted veggies, or as part of a larger holiday spread. For a fun touch, sprinkle with grated Parmesan and toasted pine nuts before serving.

Nutritional Information and Serving Size

This recipe yields about 8-10 generous servings. Each serving typically contains around 270-320 calories, depending on the cheese and pesto used—a tasty treat to enjoy with family and friends during special occasions!

Your Basil Pesto Cheesy Puff Pastry Christmas Tree (Recap)

With buttery pastry, vibrant pesto, and stretchy cheese, this festive appetizer brings together everything you love about party food in one gorgeous holiday package. Simple to make and always a hit—what more could you ask for at your Christmas gathering?

Ingredients

2 sheets frozen puff pastry, thawed
1/2 cup basil pesto (store-bought or homemade)
1 to 1 1/2 cups shredded mozzarella cheese
1/4 cup freshly grated Parmesan cheese
1 large egg (for egg wash)
Optional: pine nuts or extra Parmesan for garnish

💡Meal Planning Tip: Save this recipe to automatically generate an organized shopping list with all ingredients sorted by store section—perfect for efficient holiday grocery trips and meal planning.

CookifyAI meal planning interface

Instructions

  1. Preheat the oven to 400°F (200°C). Line a large baking sheet with parchment paper.
  2. Roll out both puff pastry sheets on a lightly floured surface until they’re roughly equal in size and large enough to cut a Christmas tree shape (about 12×9 inches).
  3. Spread the basil pesto evenly over one sheet of pastry, all the way to the edges. Sprinkle with mozzarella and Parmesan cheese.
  4. Place the second puff pastry sheet on top, pressing down lightly to seal.
  5. With a sharp knife or pizza wheel, cut out a large Christmas tree shape, saving the trimmed pastry for stars or decorations if desired.
  6. On both sides of the tree trunk, cut horizontal “branches” about 1-inch apart, leaving the center intact. Gently twist each branch a couple of times for a spiral effect.
  7. If you made extra stars or shapes from the trimmings, place them around the tree.
  8. Beat the egg and brush over the entire tree and any decorations for a golden crust.
  9. Bake 18–22 minutes, or until the pastry is golden and the cheese is bubbling.
  10. Cool slightly, then serve warm, garnished with extra Parmesan or pine nuts if you wish.

Weekly Meal Planning

This Basil Pesto Cheesy Puff Pastry Christmas Tree is a festive favorite for party planning and special occasions. Save and schedule this recipe in your meal planner to automatically create a custom shopping list and coordinate ingredients with your other holiday dishes.

Planning Benefits:

– Automatically calculates total ingredient quantities across multiple recipes
– Organizes shopping lists by grocery store section
– Prevents duplicate purchases and forgotten ingredients
– Makes weekly meal prep and party planning simple and stress-free

Pro tip: When planning your holiday menu, schedule your recipes to save time and avoid food waste—CookifyAI combines ingredients across dishes (like eggs or cheese), so you always buy the right amount.

Cook and Prep Times

Prep Time: 20 minutes
Cook Time: 20 minutes
Total Time: 40 minutes

Enjoy an appetizer that’s as merry and bright as your holiday table—happy baking!

Guilt-Free Indulgence: The Ultimate Greek Yogurt Protein Cake for Health & Flavor

Greek Yogurt Protein Cake – Light, Moist & High-Protein!

Introduction

This Greek Yogurt Protein Cake offers a deliciously satisfying way to enjoy dessert without the guilt. Unlike traditional cakes that can be dense and loaded with empty calories, this recipe delivers a light, moist crumb while packing a powerful protein punch. It’s perfect for anyone wanting a nourishing snack, a protein-rich post-workout treat, or a wholesome dessert that fits easily into a healthy routine.

Why Greek Yogurt Protein Cake Stands Out

What makes this cake a crowd pleaser is its unique combination of flavor, texture, and nutrition. The tangy richness of Greek yogurt keeps the cake moist without the need for excess fats, while the addition of protein powder amps up the nutritional content. It’s not only easy to prepare, but also endlessly customizable with your favorite mix-ins such as fresh berries, dark chocolate chips, or a dusting of cinnamon.

Achieving Lightness and Moisture

The secret behind this cake’s irresistible texture lies in the Greek yogurt. Using full-fat or 2% Greek yogurt helps create a delicate crumb while providing natural creaminess. Pairing this with egg whites and the right balance of dry ingredients results in a cake that’s never dry or crumbly—just tender and tastefully sweet. For even more flavor, consider adding lemon zest, pure vanilla extract, or a swirl of honey.

Serving Suggestions and Customizations

Enjoy this protein cake warm from the oven or chilled for a refreshing snack. Top with a dollop of extra Greek yogurt, a drizzle of honey, or a sprinkle of chopped nuts for added crunch. To serve for breakfast, try pairing a slice with your morning coffee and a handful of fruit. For dessert, a light dusting of cocoa powder or sliced fresh strawberries makes each bite extra special.

Nutritional Information and Serving Size

This recipe yields approximately 8 generous slices. Each serving contains about 120-140 calories, with 8-12 grams of protein—depending on your choice of protein powder and mix-ins. It’s a perfectly balanced treat that fits into meal plans focused on high protein, low added sugar, and mindful ingredients.

Recipe Recap: Greek Yogurt Protein Cake

With its soft, moist crumb, subtle tang, and significant protein content, this Greek Yogurt Protein Cake is a favorite among health enthusiasts and dessert lovers alike. Its versatility and ease make it a top choice for weekly meal prepping or a quick, nourishing treat.

Ingredients

1 cup plain Greek yogurt (full-fat or 2% recommended)
2 large egg whites
1 large egg
1/2 cup vanilla or unflavored protein powder
1 cup oat flour (or all-purpose flour)
1/3 cup honey or maple syrup
1 teaspoon baking powder
1/4 teaspoon baking soda
Pinch of salt
1 teaspoon vanilla extract
Optional: lemon zest, berries, dark chocolate chips, or cinnamon

💡Meal Planning Tip: Save this recipe to instantly generate a smart shopping list—everything you need, already sorted by grocery section for the easiest meal planning and shopping experience.

CookifyAI meal planning interface

Instructions

  1. Preheat your oven to 350°F (175°C). Lightly grease or line an 8-inch round or square cake pan with parchment paper.
  2. In a large bowl, whisk together the Greek yogurt, egg whites, whole egg, honey (or maple syrup), and vanilla extract until smooth and well combined.
  3. In a separate bowl, whisk the oat flour, protein powder, baking powder, baking soda, and salt. Stir dry ingredients into the yogurt mixture just until combined (do not overmix).
  4. If desired, gently fold in additions like lemon zest, berries, or chocolate chips.
  5. Pour batter into the prepared pan and smooth the top. Bake for 22-25 minutes, or until a toothpick inserted in the center comes out clean.
  6. Let the cake cool in the pan for 10 minutes, then transfer to a wire rack to cool completely. Serve warm or refrigerate for a firmer, refreshingly cool treat.

Weekly Meal Planning

This Greek Yogurt Protein Cake is an excellent addition to your weekly meal prep: it keeps well in the refrigerator and is the perfect grab-and-go snack or breakfast. Save and schedule this recipe in CookifyAI to streamline your week—your shopping list will update automatically, ensuring you always have the right ingredients on hand.

Planning Benefits:

  • Accurately total up all the ingredients you’ll need for the week
  • Sorts items by grocery section for quick, no-hassle shopping
  • Reduces meal planning stress and food waste every single week

Pro tip: When you add this protein cake to your weekly line-up with other recipes, CookifyAI automatically merges shared ingredients (like eggs or yogurt) into a single, updated grocery list—saving you time, money, and unnecessary trips to the store.

Cook and Prep Times

Prep Time: 10 minutes
Cook Time: 25 minutes
Total Time: 35 minutes

Enjoy a sweet treat that fits your lifestyle, satisfies your cravings, and keeps your meal plan on track!

Guilt-Free Decadence: The Ultimate High Protein Low Carb Chocolate Cake Recipe

High Protein Low Carb Chocolate Cake

Introduction

This High Protein Low Carb Chocolate Cake is the solution for anyone craving a decadent, satisfying dessert without the carb overload. Rich, moist, and loaded with deep chocolate flavor, it strikes the perfect balance between indulgence and nutrition—a guilt-free treat that fits seamlessly into low carb or high protein meal plans. Serve it at your next gathering or enjoy it as a smart snack: this cake is always a crowd pleaser.

Deliciously Unique High Protein Low Carb Chocolate Cake

What sets this chocolate cake apart is its nutrient profile. By swapping out traditional flour and sugar for almond flour, cocoa powder, and a high quality protein powder, each slice offers more protein and fewer carbs—ideal for those focused on muscle gain, weight management, or balanced blood sugar. The result: a dense, fudgy, and impossibly satisfying chocolate cake that’s anything but ordinary.

Tips for Extra Moisture and Richness

To make this cake extra moist without added carbs, use plain Greek yogurt and eggs, which supply both protein and a tender crumb. For dark, chocolatey depth, choose unsweetened cocoa powder and a high quality sugar substitute like erythritol or monk fruit. If you prefer even more richness, fold in some sugar free chocolate chips or a swirl of almond butter before baking.

Serving Suggestions for a Standout Chocolate Cake

Pair warm slices of this cake with a dollop of whipped cream, a sprinkle of cocoa, or some sliced fresh berries to complement the chocolate’s intensity. For a treat with even more texture, top with chopped nuts or a few sugar free chocolate shavings. Leftovers store well in the fridge for easy, protein-packed desserts any day of the week.

Nutritional Information and Serving Size

This recipe yields approximately 10 servings, each with around 135 calories, 9g protein, 5g net carbs, and 7g fat (values may vary depending on the protein powder and sweetener used). Enjoy your cake while staying committed to your low carb, high protein goals!

Ingredients

1 cup almond flour
1/3 cup unsweetened cocoa powder
1/2 cup vanilla, chocolate, or unflavored protein powder
1/2 cup erythritol or monk fruit sweetener
1 1/2 teaspoons baking powder
1/2 teaspoon salt
3 large eggs
2/3 cup plain Greek yogurt (unsweetened or 2%)
1/3 cup unsweetened almond milk
2 teaspoons vanilla extract
Optional: 1/3 cup sugar free chocolate chips or chopped walnuts

💡Meal Planning Tip: Save this recipe to automatically generate an organized shopping list with all ingredients sorted by store section—perfect for efficient grocery trips and meal planning.

CookifyAI meal planning interface

Instructions

  1. Preheat your oven to 350°F (175°C). Grease a 9-inch round cake pan or line it with parchment paper for easy removal.
  2. In a large bowl, whisk together almond flour, cocoa powder, protein powder, sweetener, baking powder, and salt until well combined.
  3. In a separate bowl, whisk eggs, Greek yogurt, almond milk, and vanilla extract until smooth and creamy.
  4. Add the wet ingredients to the dry ingredients, mixing until a thick batter forms. Fold in optional chocolate chips or nuts, if desired.
  5. Spread the batter evenly into the prepared pan. Tap the pan gently to remove air bubbles.
  6. Bake for 20–25 minutes, or until a toothpick inserted in the center comes out clean or with a few moist crumbs. Do not overbake for best texture.
  7. Let the cake cool completely in the pan before slicing and enjoying. For extra decadence, top with whipped cream or dust with cocoa powder.

Weekly Meal Planning

This High Protein Low Carb Chocolate Cake is ideal for prepping ahead—portion and store slices for a grab-and-go healthy dessert or snack all week long. Save and schedule this recipe to automatically add all required ingredients to your weekly shopping list and consolidate groceries with your other planned meals.

Planning Benefits:

  • Automatically calculates ingredient quantities across the week
  • Creates a single, organized grocery list by store section
  • Reduces duplicate purchases and prevents forgotten items
  • Keeps your prep, baking, and meal planning streamlined

Pro tip: When combining this cake with other meal prep recipes, schedule your recipes to see overlapping ingredients—saving money, reducing waste, and making your weekly shop simpler.

Cook and Prep Times

Prep Time: 10 minutes
Cook Time: 25 minutes
Total Time: 35 minutes

Protein Cake: The Perfect Blend of Delicious Indulgence and Nutritious Fuel

Protein Cake

Introduction

Protein Cake seamlessly blends indulgence and nutrition, making it the perfect solution for those who crave dessert without compromising on their health goals. This tender, moist cake packs a protein punch, delivering satisfying flavor and a boost of energy—ideal for post-workout snacks, healthy breakfasts, or guilt-free sweet treats for the whole family.

Packed with Flavor and Nutrition

What sets this Protein Cake apart is the rich, bakery-style taste combined with impressive nutritional stats. By using protein powder and wholesome ingredients like Greek yogurt or nut butter, you get a tender crumb, subtle sweetness, and enough protein to help fuel your day. It’s versatile, easy to customize, and a guaranteed crowd pleaser—no one will guess it’s actually good for you!

Choosing Your Protein Base

Selecting the right protein powder is key to creating a cake with great taste and texture. Opt for a high-quality vanilla or chocolate protein powder for classic flavor, or branch out with a cinnamon, peanut butter, or plant-based blend for variety. For extra moisture, consider adding Greek yogurt or unsweetened applesauce. Mix-ins such as berries, chocolate chips, or chopped nuts add dimension and make the cake your own.

Baking Your Protein Cake to Perfection

To ensure a soft, moist crumb, gently fold your dry ingredients into the wet mixture and avoid overmixing. Pour the batter into a lined cake pan and smooth the top with a spatula. A quick bake in a preheated oven preserves the cake’s structure and keeps it from drying out. Let it cool before slicing to allow the flavors to settle and the cake to firm up.

Serving Suggestions for a Winning Protein Cake

Protein Cake shines whether served plain, topped with a dollop of Greek yogurt, drizzled with nut butter, or paired with fresh seasonal fruit. For extra decadence and flavor, a sprinkle of cocoa powder, toasted nuts, or a light dusting of powdered sugar can elevate each slice. Perfect as a grab-and-go snack, healthy dessert, or even packed into lunchboxes for on-the-go fuel.

Nutritional Information and Serving Size

This recipe yields approximately 8 hearty slices, each containing around 140–180 calories and 8–12 grams of protein, depending on the protein powder and mix-ins used. It’s a satisfying, nutrient-dense way to enjoy dessert while supporting your daily protein intake.

Protein Cake Recap

With its blend of light sweetness, moist crumb, and customizable extras, Protein Cake is the ultimate guilt-free dessert that delivers on taste and nutrition—a must-have for meal preppers and anyone craving a better-for-you treat.

Ingredients

1 cup oat flour (or old-fashioned oats, blended)
1/2 cup vanilla or chocolate protein powder
1 tsp baking powder
1/4 tsp salt
1/2 cup unsweetened applesauce or Greek yogurt
2 large eggs
1/3 cup milk of choice (dairy or nut-based)
1/3 cup maple syrup or honey
2 tbsp nut butter (peanut, almond, or cashew)
1 tsp vanilla extract
Optional: 1/3 cup chocolate chips, berries, or chopped nuts

💡Meal Planning Tip: Save this recipe to instantly create a streamlined shopping list with every ingredient organized by grocery section. Perfect for keeping your meal planning on track and your pantry stocked!

CookifyAI meal planning interface

Instructions

  1. Preheat your oven to 350°F (175°C). Line or lightly grease an 8-inch round or square cake pan.
  2. In a mixing bowl, whisk together oat flour, protein powder, baking powder, and salt.
  3. In a separate bowl, blend applesauce or Greek yogurt, eggs, milk, maple syrup (or honey), nut butter, and vanilla extract until smooth.
  4. Gradually fold the dry ingredients into the wet ingredients. Stir just until combined—do not overmix.
  5. If using, fold in chocolate chips, berries, or chopped nuts.
  6. Pour batter into the prepared pan. Smooth the top evenly.
  7. Bake for 22–28 minutes, or until a toothpick inserted in the center comes out clean.
  8. Let the cake cool completely before slicing and serving.

Weekly Meal Planning

Protein Cake is perfect for meal prepping and busy weeks. Save and schedule this recipe to effortlessly plan your snack lineup and add all ingredients from your planned meals to a consolidated, sorted shopping list.

Planning Benefits:

– Automatically tallies ingredient amounts if making multiple cakes or other planned meals
– Provides shopping lists sorted by store section for speedier grocery trips
– Prevents duplicate buying and missing key ingredients
– Helps you meet your nutrition goals with organized meal planning

Pro tip: If you’re planning several snacks or healthy desserts, schedule all your recipes to see how staple ingredients like eggs or milk add up—CookifyAI ensures you buy exactly what you need, every time.

Cook and Prep Times

Prep Time: 10 minutes
Cook Time: 25 minutes
Total Time: 35 minutes

Enjoy this easy, nourishing Protein Cake—where delicious meets nutritious, and meal planning becomes a breeze!

Lemon Almond Cottage Cheese Cake: A Light, Zesty Indulgence

Lemon Almond Cottage Cheese Cake – SiLLibake

Introduction

If you’re seeking a dessert that’s both refreshingly light and deeply satisfying, this Lemon Almond Cottage Cheese Cake is the answer. The tang of lemon brings brightness, while toasty almonds and creamy cottage cheese create rich, tender layers. Unlike heavier cheesecakes, this cake feels surprisingly airy and balanced—a perfect treat whether you’re entertaining guests or looking for something new in your weekly dessert rotation.

Why Lemon Almond Cottage Cheese Cake Stands Out

This recipe shines for its unique combination of ingredients: cottage cheese lends a moist, delicate crumb that contrasts beautifully with the nutty crunch of almonds, while lemon zest infuses every slice with fresh flavor. The cake isn’t overly sweet, making it versatile enough for breakfast, brunch, or dessert, and it comes together simply, with everyday ingredients.

Preparing a Smooth Cottage Cheese Filling

Using cottage cheese in cakes adds creaminess and a subtle tang. For the best texture, blend the cottage cheese until smooth before folding it into the batter. This step ensures a silky, uniform crumb without lumps. To heighten the flavors, use fresh lemon zest and juice, and toast the almond slices until golden—these minor touches make a major difference.

Assembly and Baking Tips

Once your batter is mixed, pour it into a lined cake pan and scatter with extra sliced almonds for a beautiful, golden finish. Bake until the cake is just set and a tester comes out clean—avoid overbaking to keep the cake moist. After cooling, dust with powdered sugar and add a few lemon curls for a bakery-worthy presentation.

Serving Suggestions for Lemon Almond Cottage Cheese Cake

Present slices with a dollop of whipped cream or a drizzle of honey. This cake pairs beautifully with fresh berries or a lightly sweetened yogurt on the side. Its vibrant flavor makes it a deliciously memorable centerpiece for morning coffee, afternoon tea, or a casual dinner party.

Nutritional Information and Serving Size

This recipe yields 8–10 slices. Each serving offers protein from cottage cheese and healthy fats from almonds, averaging about 230–250 calories per slice (depending on slice size and toppings). It’s a lighter alternative to traditional cheesecakes, perfect for sharing.

Lemon Almond Cottage Cheese Cake (Recap)

This SiLLibake cake effortlessly blends tart lemon and nutty almond in a luscious, protein-rich batter. Its remarkable texture and subtle sweetness make it a favorite for both special occasions and everyday enjoyment.

Ingredients

1 cup cottage cheese (blended or whipped for smoothness)
3 large eggs
3/4 cup granulated sugar
1/4 cup olive oil or melted butter
1 tablespoon lemon zest (from about 2 lemons)
2 tablespoons freshly squeezed lemon juice
1 teaspoon vanilla extract
1 cup all-purpose flour (or almond flour for a gluten-free version)
1/2 cup ground almonds
1 1/2 teaspoons baking powder
1/4 teaspoon salt
1/3 cup sliced almonds (for topping)
Optional: Powdered sugar for dusting; lemon curls for garnish

💡Meal Planning Tip: Save this recipe to CookifyAI for an automatic, organized shopping list grouped by grocery section—no more forgotten ingredients or wasted time in the store!

CookifyAI meal planning interface

Instructions

  1. Preheat your oven to 350°F (175°C). Line an 8-inch round cake pan with parchment and lightly grease the sides.
  2. In a blender or food processor, puree the cottage cheese until smooth.
  3. In a large mixing bowl, whisk together eggs and sugar until light and fluffy.
  4. Gradually mix in the olive oil (or melted butter), lemon zest, lemon juice, and vanilla extract.
  5. Fold in the blended cottage cheese until fully combined.
  6. Whisk together the flour, ground almonds, baking powder, and salt in a separate bowl. Add the dry ingredients to the wet ingredients, stirring gently until just combined.
  7. Pour the batter into the prepared pan. Smooth the top, then sprinkle sliced almonds evenly over the batter.
  8. Bake for 35–40 minutes, or until a toothpick inserted in the center comes out clean and the top is golden.
  9. Cool in the pan for 10 minutes, then remove to a rack to cool completely.
  10. When ready to serve, dust with powdered sugar and top with lemon curls, if desired.

Weekly Meal Planning

This Lemon Almond Cottage Cheese Cake is excellent for meal planning—enjoy a slice as a snack, breakfast, or dessert throughout the week. Save and schedule the recipe in CookifyAI to slot it into your plan, and generate streamlined shopping lists that sync with your entire weekly menu.

Planning Benefits:

  • Total up all needed ingredients for the week—no more overbuying or last-minute trips.
  • Automatic list organization by grocery aisle for speedy shopping.
  • Catch ingredient overlap for savings and reduced food waste.
  • Every meal (even dessert!) fits seamlessly into your meal plan.

Pro tip: Plan all your SiLLibake recipes together and see ingredient totals at a glance—especially helpful for staples like eggs, flour, and citrus!

Cook and Prep Times

Prep Time: 20 minutes
Cook Time: 35–40 minutes
Total Time: About 1 hour

High-Protein Greek Yogurt Dump Cake: A Guilt-Free Indulgence

High-Protein Dump Cake with Greek Yogurt – Moist, Delicious, and Healthy

Introduction

When you want dessert without the guilt, this High-Protein Dump Cake with Greek Yogurt is your answer. Moist, delicious, and packed with nourishing protein, this cake transforms the classic dump cake into a health-conscious treat you can feel great about serving any day of the week. Whether it’s a post-workout snack, a wholesome party dessert, or an easy way to curb a sweet tooth, this recipe offers both flavor and nutrition in every bite.

Why You’ll Love This High-Protein Dump Cake

Traditional dump cakes are famous for their simplicity, but this version raises the bar with the addition of Greek yogurt and protein powder. The result? An ultra-moist, fluffy cake that’s loaded with protein, making it both satisfying and lighter on empty calories. With juicy fruit layers and a hearty crumb, it’s a great option for anyone seeking a healthier dessert that doesn’t sacrifice taste.

The Key to a Moist, Protein-Packed Cake

Greek yogurt works double-duty in this recipe: it adds rich moisture to the cake while helping to increase the overall protein content. Paired with your favorite vanilla or unflavored protein powder, this dump cake boasts a nutritional upgrade that’s perfect for fitness enthusiasts and families alike. To maximize flavor, choose a good quality fruit filling and a cake mix with clean, simple ingredients.

Simple Steps to the Perfect Dump Cake

All you need to do is “dump” the layers into the pan — first the fruit, then the Greek yogurt-protein mixture, and finally the cake mix sprinkled on top. No elaborate techniques or special tools necessary. Dotting the cake with a small amount of butter ensures a golden, crisp topping while keeping the fat content in check.

Serving Suggestions

Enjoy this high-protein dump cake warm from the oven, topped with a dollop of extra Greek yogurt or a small scoop of light vanilla ice cream. For added flair, sprinkle with chopped nuts or a pinch of cinnamon. Serve it as a healthier summer dessert, a quick weeknight treat, or even as a breakfast cake on busy mornings.

Nutritional Information and Serving Size

This recipe makes 8 servings, with each piece containing roughly 160–200 calories and 10–12 grams of protein, depending on your protein powder and yogurt choice. The cake offers a balanced mix of carbohydrates and protein without excessive sugar or fat, making it a smart sweet option.

Recipe Recap: Why This High-Protein Dump Cake Shines

This dump cake is a game changer for dessert lovers: easy to prepare, loaded with protein, and so deliciously moist, you’ll wonder how it could possibly be good for you. The inclusion of Greek yogurt adds creaminess and boosts nutrition, making it both a crowd-pleaser and a healthy indulgence.

Ingredients

• 1 (15–16 oz) can of fruit pie filling (peach, cherry, apple, or your choice)
• 1 ½ cups plain Greek yogurt (nonfat or 2%)
• 2 scoops vanilla or unflavored protein powder (approx. 1/2 cup)
• 1 box (about 15 oz) vanilla or yellow cake mix—look for high-quality or sugar-free if desired
• 2 tablespoons unsalted butter, cut into small pieces
• Optional: ½ teaspoon cinnamon or a handful of chopped nuts for topping

💡Meal Planning Tip: Save this recipe to automatically generate an organized shopping list with all ingredients sorted by store section—perfect for efficient grocery trips and streamlined meal planning.

CookifyAI meal planning interface

Instructions

  1. Preheat your oven to 350°F (175°C). Lightly grease a 9×13-inch baking dish.
  2. Spread the canned fruit pie filling evenly across the bottom of the dish.
  3. In a medium bowl, whisk together Greek yogurt and protein powder until smooth. Drop or spread this mixture evenly over the fruit layer.
  4. Sprinkle the dry cake mix evenly over the yogurt layer. Do not stir.
  5. Dot the top of the cake with small pieces of butter. If using, sprinkle cinnamon or nuts on top for extra flavor and crunch.
  6. Bake in the preheated oven for 35–40 minutes, or until the top is golden brown and the edges are bubbly. Allow to cool for at least 10 minutes before serving.

Weekly Meal Planning

This High-Protein Dump Cake is a delicious way to add variety to your weekly meal prep. Save and schedule this recipe to plan out your desserts or snacks for the week and generate a streamlined shopping list for all your planned meals.

Planning Benefits:

  • Accurately calculates ingredient totals across multiple recipes
  • Organizes your entire shopping list by store sections
  • Helps prevent food waste by linking overlapping ingredients
  • Makes your weekly prep and shopping faster and easier

Pro tip: When batching your weekly meal plan, schedule recipes with similar ingredients (like Greek yogurt or fruit) so your shopping is even more efficient and cost effective.

Cook and Prep Times

Prep Time: 10 minutes
Cook Time: 35–40 minutes
Total Time: 50 minutes

Enjoy a guilt-free dessert that’s as easy to make as it is good for you!

High-Protein Cottage Cheese Cheesecake: A Deliciously Healthy Twist on a Classic Treat

Best Easy Cottage Cheese Cheesecake {High Protein}

Introduction

Cottage cheese cheesecake takes the classic dessert to a new level—with less fuss and more nutrition. This high-protein variation swaps in cottage cheese for cream cheese, resulting in a cheesecake that’s light, creamy, and satisfying. If you’re looking for a dessert that’s easy, versatile, and supports a healthy lifestyle, this recipe is a must-try. It’s perfect for fitness enthusiasts, family gatherings, or anyone who loves indulging without overdoing it.

Why This Easy Cottage Cheese Cheesecake Is a Game Changer

The hallmark of this cheesecake is its simplicity and impressive nutritional profile. Cottage cheese blends into a silky-smooth filling, delivering that classic cheesecake flavor with a fraction of the calories and a boost of protein. The crust is a simple press-in graham cracker base, and the filling requires minimal mixing—no complicated steps here! It’s a deliciously easy way to satisfy your cheesecake cravings and please a crowd.

Preparing the High-Protein Cottage Cheese Filling

For the perfect filling, blend your cottage cheese until completely smooth before adding the other ingredients. This guarantees a creamy, velvety texture—no lumps! The rest is simple: add eggs, Greek yogurt, sweetener (honey, sugar, or a sugar substitute), and a touch of vanilla. This produces a rich, flavorful cheesecake with a substantial protein kick that’s perfect for snack time or a dessert without regret.

Effortless Assembly for an Impressive Dessert

Once your crust is pre-baked and filling blended, pour the mixture over the crust and bake until set. With minimal prep and basic ingredients, you get a cheesecake that looks and tastes gourmet. Chill the cake thoroughly before slicing; this allows flavors to develop and the texture to set perfectly for clean, beautiful servings.

Serving Suggestions for Your Best Cottage Cheese Cheesecake

Serve chilled, topped with fresh berries, a dollop of Greek yogurt, or a light drizzle of honey. For extra flair, sprinkle with toasted nuts, lemon zest, or even a handful of granola. It’s delicious on its own, but these toppings add color, crunch, and even more protein—all without weighing you down.

Nutritional Information and Serving Size

This recipe yields 8 generous slices, with each portion providing approximately 13–16g of protein (depending on cottage cheese and yogurt brands used) and 180–220 calories. It’s a guilt-free dessert or midday snack you’ll feel good about enjoying.

Best Easy Cottage Cheese Cheesecake (Recap)

This high-protein cottage cheese cheesecake is creamy, satisfying, and incredibly easy to make. It offers all the decadence of a classic cheesecake but with wholesome ingredients and a nutritional punch—a crowd-pleaser that fits into any healthy meal plan.

Ingredients

For the crust:
1 cup graham cracker crumbs (or almond flour for gluten-free)
2 tablespoons melted butter
1 tablespoon honey or sugar
For the cheesecake filling:
2 cups cottage cheese (full-fat or low-fat)
2/3 cup Greek yogurt (plain)
2 large eggs
1/2 cup sugar or a sugar substitute
2 teaspoons vanilla extract
1 tablespoon cornstarch (optional, helps with texture)
Pinch of salt

💡Meal Planning Tip: Save this recipe to automatically generate a complete shopping list—ingredients sorted by grocery aisle for a faster, easier trip. CookifyAI makes meal prep and planning streamlined!

CookifyAI meal planning interface

Instructions

  1. Preheat your oven to 350°F (175°C). Line or lightly grease an 8″ springform pan.
  2. Mix graham cracker crumbs, melted butter, and honey (or sugar) until the mixture resembles wet sand. Press evenly into the bottom of the pan. Bake for 8–10 minutes, then let cool.
  3. In a blender or food processor, blend the cottage cheese until completely smooth.
  4. Add Greek yogurt, eggs, sugar (or substitute), vanilla extract, cornstarch (if using), and pinch of salt. Blend until creamy and fully combined.
  5. Pour the cottage cheese filling over the cooled crust and smooth the top.
  6. Bake for 35–40 minutes, or until set at the edges but slightly wobbly in the center. Turn off oven and let cheesecake cool inside with the door cracked for 1 hour.
  7. Chill in the refrigerator for at least 4 hours before serving for best texture and flavor.

Weekly Meal Planning

This cheesecake isn’t just a dessert—it’s a smart make-ahead snack or breakfast for the week. Save and schedule this recipe on CookifyAI to organize meal plans, consolidate all your shopping lists, and avoid duplicate purchases.

Planning Benefits:

  • Efficiently combines all ingredient quantities across your weekly meal plan
  • Sorts grocery lists by section for lightning-fast shopping trips
  • Reduces food waste by using ingredients across multiple recipes
  • Keeps your meal prep effortless and organized

Pro tip: Schedule multiple high-protein recipes, like this cheesecake and a savory cottage cheese breakfast bake, and let CookifyAI calculate exactly how much cottage cheese, eggs, and yogurt you need in total!

Cook and Prep Times

Prep Time: 15 minutes
Cook Time: 40 minutes
Total Time: 55 minutes (plus chilling)